Tuesday, February 11, 2014
Upper pull out cabinet project Part I
Our solution was to make a pull out cabinet with low sides, similar to a pull out tray. We decided its best to match the surrounding cabinets profiles on the face, and also match the color. Each presents its own challenges. Trying to match profiles requires having the right router knives. Ive had to buy a bit that will match the raised panel. As far as matching the color, I have found a match, and it will be close, but not exact. The existing kitchen is nearly 25 years old, so with oils, proteins, etc., from cooking all those years, as well as fading from nearby light sources, an exact match cannot be guaranteed, but it will be very close!
Here are some pictures of the space to fill, and also of the tray and door assembly. I have used a combination of box joinery and rabbit joinery on the tray. I also have a match on the three different profiles on the door, and have a sample door to compare it to. After the glue sets, I can stain, finish, and install this piece! The front "door" will be stained and finished, while the tray itself will be clear coated (similar to the surrounding cabinets).


Monday, February 10, 2014
Our Next project Weekend in Review

Saturday we went to Santa Barbara. It was such a hot and pretty day! We toured the mission, love the contrast against the mountains in the background! State St. is always one of my favorite stops.
Anthropologie and Paper Source always have fun things to look at. I made it out with just this napkin from Anthro, isnt it great? :)
We had dinner out on the pier. I love the glass bottom tables there. There are seals nearby, but we didnt see any swimming below. But, just looking at the water is pretty!
Finally, we decided that we would build a shelving unit similar to the Ikea Vittsjo for next to the sofa in the living room. $70 is definitely reasonable for the unit; however, taking into account that one wasnt quite long enough and needing to sell it at the end of the summer (well be selling lots of furniture when we move then) and not getting our money back, building made more sense. Our building supplies were super low, about $35! We still need to paint, but I like it so far!
Paint is up next! Check back for updates.
Tuesday, February 4, 2014
Northville MI project Shadowboxing Part II


And here Ive done more shadowboxing at the bay window to finish out the dining room. The next project will be chair rail and shadowboxing on the stairway - stay tuned!


Wednesday, January 29, 2014
Woodworking plan & project
Get Woodworking plan & project
Free woodworking plans, projects and patterns at, Free woodworking plans and easy free woodworking projects added and updated every day. use our rss feed to keep up-to-date on the latest free woodworking information.. Woodcraft - woodworking plans & tools | fine woodworking, Woodcraft offers over 20,000 woodworking tools, woodworking plans, woodworking supplies for the passionate woodworker..

Fine woodworking - official site, Expert advice on woodworking and furniture making, with thousands of how-to videos, step-by-step articles, project plans, photo galleries, tool reviews, blogs, and more.. Rockler - woodworking tools supplies hardware plans, Shop for woodworking tools, plans, finishing and hardware online at rockler woodworking and hardware. find thousands of woodworking supplies like drawer slides. Woodworking plans, projects, & patterns - diy network, Discover woodworking tips, ideas and how-to projects from diy network. Woodworking plans online, Woodworking plans online are ideal for any woodworking project weather you are a professional woodworker or just a beginner. there is a lot of time to be waisted. Wood - official site, Woodworking member of the better homes and gardens family of magazines featuring how-to project instructions, techniques, tool reviews, wood technology, and craftsman. Ana white | free and easy diy furniture plans to save you, Free plans to help anyone build simple, stylish furniture at large discounts from retail furniture. all woodworking plans are step by step, and include table plans.


Sunday, January 26, 2014
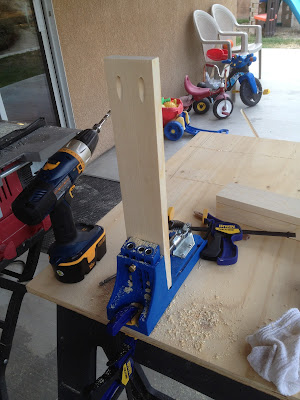
This weekends project


Friday, January 24, 2014
Look Project ideas for high school english
This Project ideas for high school english must see
Science made simple - science projects, ideas & topics, Science projects & articles. easy home & school science projects for kids. plus, science articles and ideas, topics & instructions for great experiments.. Science fair projects & experiments: topics, ideas, Science fair projects: topics, ideas, experiments, resources, and sample projects..

Science fair projects | step-by-step guide to science, Find free super science fair projects and easy search tool to find over 500 ideas, topics, experiments, how judges think, parent's guide and teacher resource center.. Best science projects - k-12th grade - fun, cool, easy, Fun science fair projects make your science fair projects fun! cool science fair experiments check out these cool science fair projects! winning science fair ideas. List of science fair project ideas, Below is a list of the 1190 science fair project ideas on our site. to help you find a topic that can hold your interest, science buddies has also developed the topic. Harvard summer school - official site, College prep ideas. ideas for gaining experience while in high school →. Homeworkspot.com: homework help, science fair project, Who was the longest reigning british monarch? why do dolphins leap from the water? how many hours teenagers volunteer per week? what is the average cost of a textbook?. High school musical - wikipedia, the free encyclopedia, High school musical is a 2006 american television film and the first installment in the high school musical trilogy. upon its release on january 20, 2006, it became.


Try Project ideas for high school english its good
Project ideas for high school english ,